


Removing the cover. Most seats have some kind of snap or clips that attach the cover to the frame.

Uncovered.

Hole. Not deep, but clearly foam breakdown.
Once we had the seat cover off, and I could correctly assess the situation, and I lifted the "seat" of the seat.

Did you know a car seat is mostly metal and then some high density foam and a cover? Well it is. And the above metal supports are what we sit on, which doesn't look too comfy. I measured and cut pieces of foam, then wrapped them in burlap for added support.


I used spray adhesive to hold the burlap onto the foam. Then I placed them around the underside of the seat where the metal bars go into the foam cushion. My hope is the burlap will be a little more sturdy and give a little more support to the foam. We also purchased a 2" foam seat cushion and covered it in burlap as well and added it to the inside:
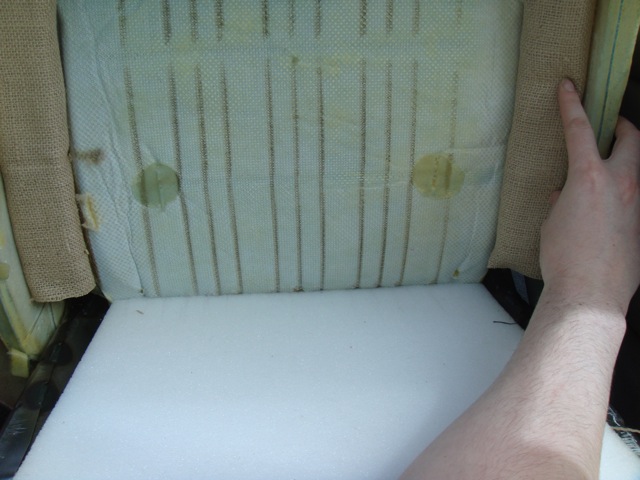
See how the wire supports have begun to cut into the bottom of the seat?

New cushion bottom supported with burlap
The idea is the pressure of the seat against the metal frame will hold the added foam in place. What about the top of the seat? I don't know if you've noticed but seats are kind of lipped up (or thicker?) to support your backside when you sit in the car---remember the side had the hole...well, we fixed that too.

Added strips of 1" foam to the top-this can be tricky because remember you have to put the cover back!
I was also trying to get Hubby to take a picture of my wedding band set sparkling in the sun...he wouldn't cooperate.

We added two 1" pieces to the drivers side since the driver was the one complaining...
When you go to put the cover back on, once you've added sufficient amounts of foam in the right places, HERE'S THE TRICK. Start from the inside of the seat (by the console) and fit that side back over your foamy addition. There is probably Velcro of some type, match up the velcro first-then pull the rest of the cover over the seat ending at the door side. Trust me it keeps it from getting lumpy and makes sure everything stays in place.

This is the velcro seam I am talking about-get this part together before you pull the rest of the cover back...
And here's the final product:

The passenger's side = COMFY!

The driver's side...
While I did not think there was anything wrong with the seat to begin with, there is a noticeable difference in the way the seat is now versus before.
I am not advocating everyone go out and work on their seats, but if you find yourself in an uncomfortable driver/passenger seat foam breakdown could be the cause and it can easily be fixed!
Total:
-2 1" foam pieces (20"x30" I think) $3 ea
-2 2" foam seats (12"x12") $1.50 ea
-Spray adhesive (on hand)
-1 yd burlap $1.99
Cost: Less than $10
AND 2 hours of time.
Hope you enjoyed this craft, my hubby and I did!
-Jess
I'm linking up to:


Wow, great job! Anyone can make a birds' nest out of burlap (no offense to anyone who has), but you cushioned a car seat! Nice job, Jess!
ReplyDeleteWow, that is awesome. I can't believe you guys did that by your self. Great job! It looks great! :)
ReplyDelete~Elisabeth
so clever and well done! ...makes me so happy that I stopped by! I hope to see you at my place one day this week when you get a moment. until later...
ReplyDeleteWow, good to know. I never would have had the guts to tackle that project, way to go.
ReplyDeleteWow! That really looks wonderful! You guys rock!
ReplyDeleteWow, I never would have thought of this! Good thinking--thanks for sharing!
ReplyDeleteOh my Heavens! I would never think of touching something like that! Great job!
ReplyDelete